Sell Tickets
Sell tickets right at the door using cash, credit or comp. Our easy to use Sell Tickets screen will make your box office operation a breeze.
Navigating to the Sell Tickets Screen
Navigate to your client dashboard. To sell tickets for all events on your client account, select Box Office Sales from the left side Box Office Menu.

You can also scan for a specific event by selecting the Box Office quick link.

After opening the Box Office, you should land on the Entry screen. Select the Sell Tickets tab to begin selling tickets.
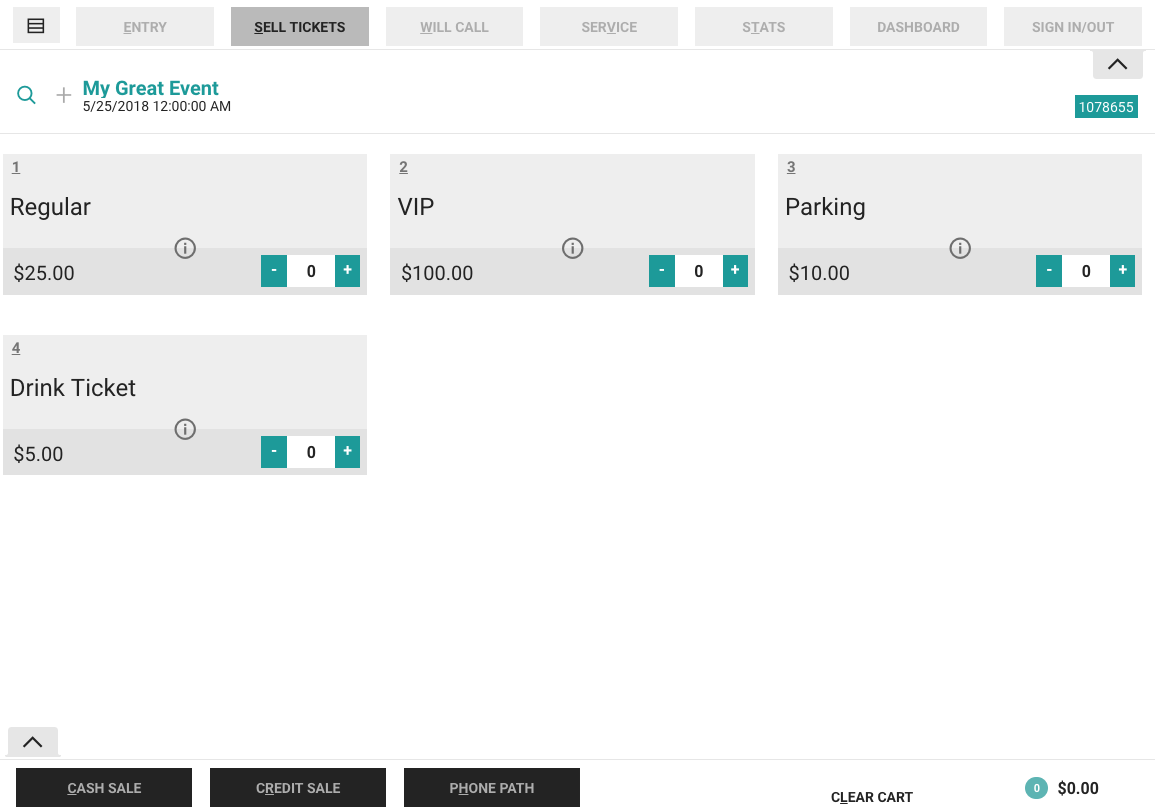
From here you can see all ticket types for your event. In this example, we have Regular, VIP, Parking and Drink Ticket.
Selling Tickets
To sell a ticket to a customer you can click the blue + sign in the bottom right corner of the ticket type or click on the ticket type itself. You can also use one of the assigned hot keys in grey located in the top left corner of each ticket type box. In this case, pressing 1 would add one Regular ticket.
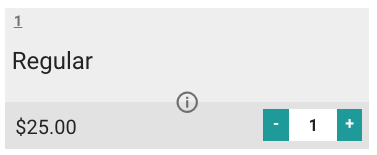
Each click adds one ticket, so be sure to check the field on each ticket type or the total at the bottom of the screen to verify that you have added the correct number of tickets. To add increments of 10 tickets, hold down number of the hot key you want.
You’ll notice the number in the bottom right corner populate with the total ticket cost after all fees are applied.

All ticket types you add will also be reflected in the bottom right total.
When you’re ready to check out, you can select Cash Sale, Credit Sale, or Comp (free) if you need to provide a free ticket (the comp option is only available for users with certain permissions).

Cash Sale
To make a cash sale, select the Cash Sale button at the bottom of the screen. A popup will appear where you can enter the amount of cash received.

Enter the amount of cash received from the customer using the number keys and click Enter. This will help with the calculation of change if needed. After you have given the change to the customer, click Next or press the N hot key.
You’ll get a message of Transaction Complete and the screen will return to the box office dashboard.
Credit Card Sales
From the same screen in the box office, you can follow the steps above to add tickets to your order.
Swipe Credit Card
To process a credit card sale, you’d press the Credit Sale button or the R hot key.
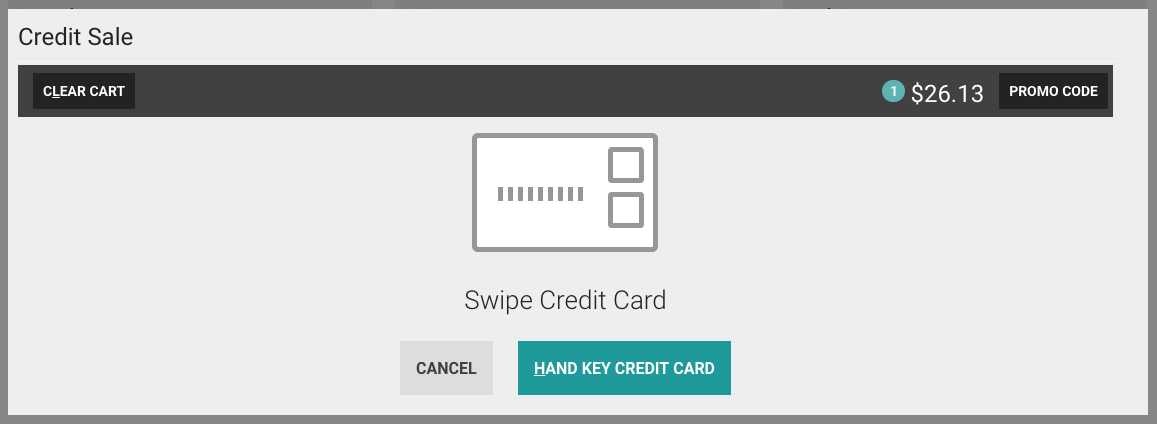
You will be prompted to swipe the credit card. If you are using a credit card reader, be sure the magnetic strip is facing the right direction according to your credit card swipe. The system will automatically pull the information for the charge and complete the transaction. You will return to the Sell Tickets screen.
Hand Key Credit Card
If you’re working without a card reader or the card is too damaged to read, you can still hand key the information. After selecting Credit Sale, press the blue Hand Key Credit Card button at the bottom of the window.
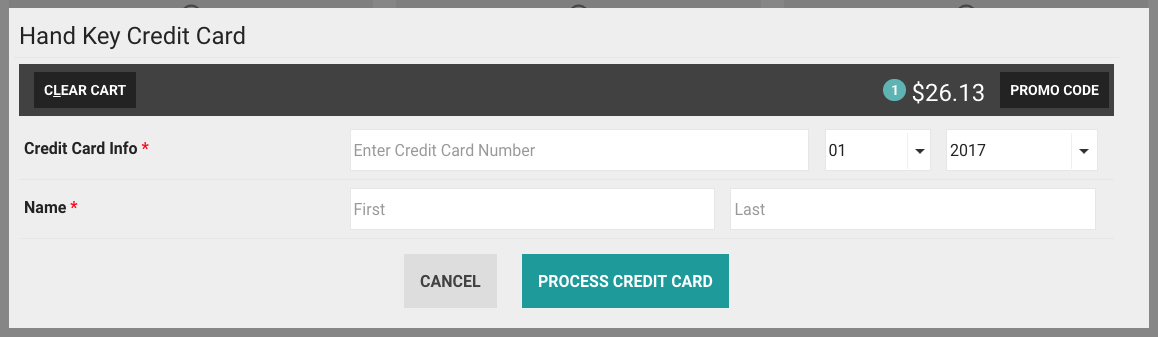
Be sure to complete all the fields. When everything is entered, press Process Credit Card. If everything goes through successfully, you’ll be brought back to the Sell Tickets screen after it reads Transaction Complete.
Comp Tickets
If you need to create Comp tickets, follow the same steps as above and press the Comp button or use the F key.
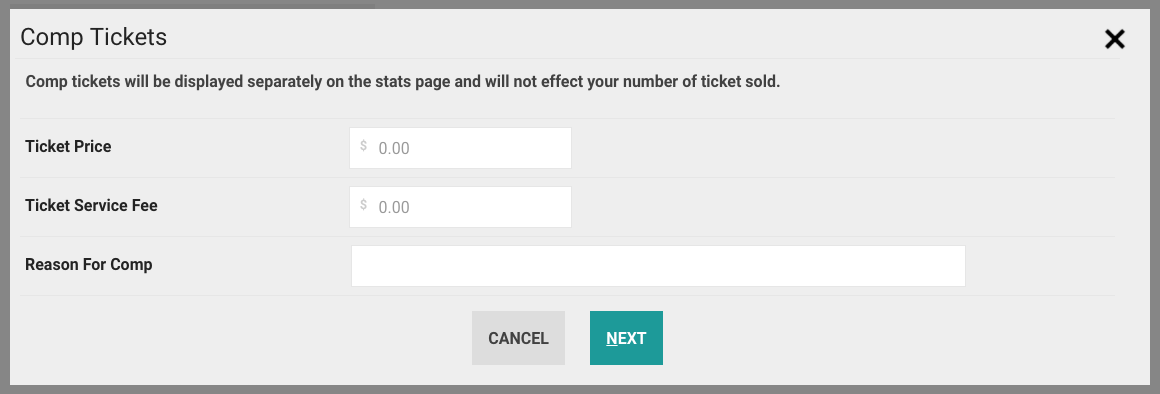
Enter the price you want displayed on the ticket as well as the service fee if you’re printing tickets. It’s not necessary to enter the information for every ticket type unless you are printing tickets. If you leave it blank, it won’t print on the ticket. After you enter all relevant information, click Next or use the N hot key.
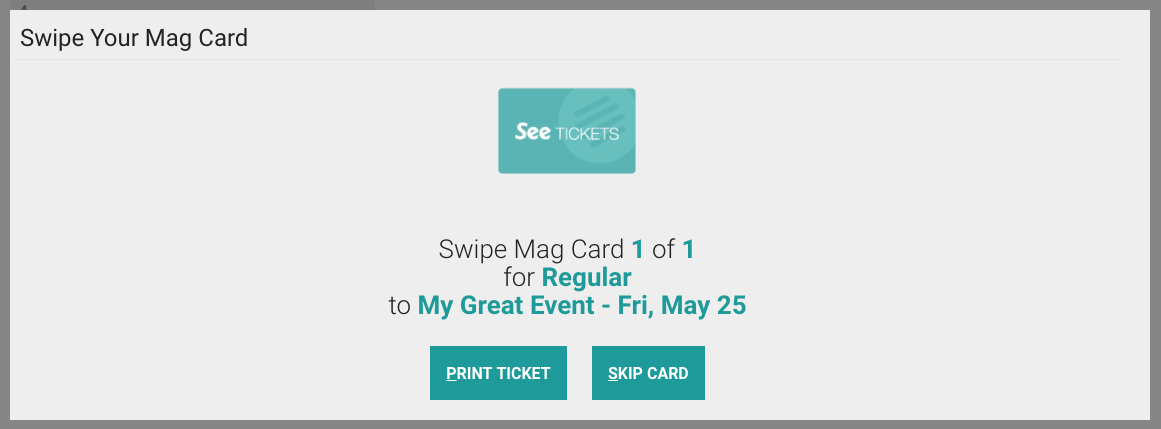
Order Fulfillment
After completing any of the above orders, the next screen will ask you to swipe your mag card. If you’re using Mag Cards, swipe the ticket through the reader now. If you’re printing tickets, click Print Ticket or use the P hot key. If you’re handing out paper tickets, click Skip Card or press the S hot key.
Additional Ticket Selling Options
To activate the following features, contact See Tickets client service or your client service representative.
Collect Customer Information
If you have this setting turned on for your brand and wish to collect customer information, you will be prompted to do so here.
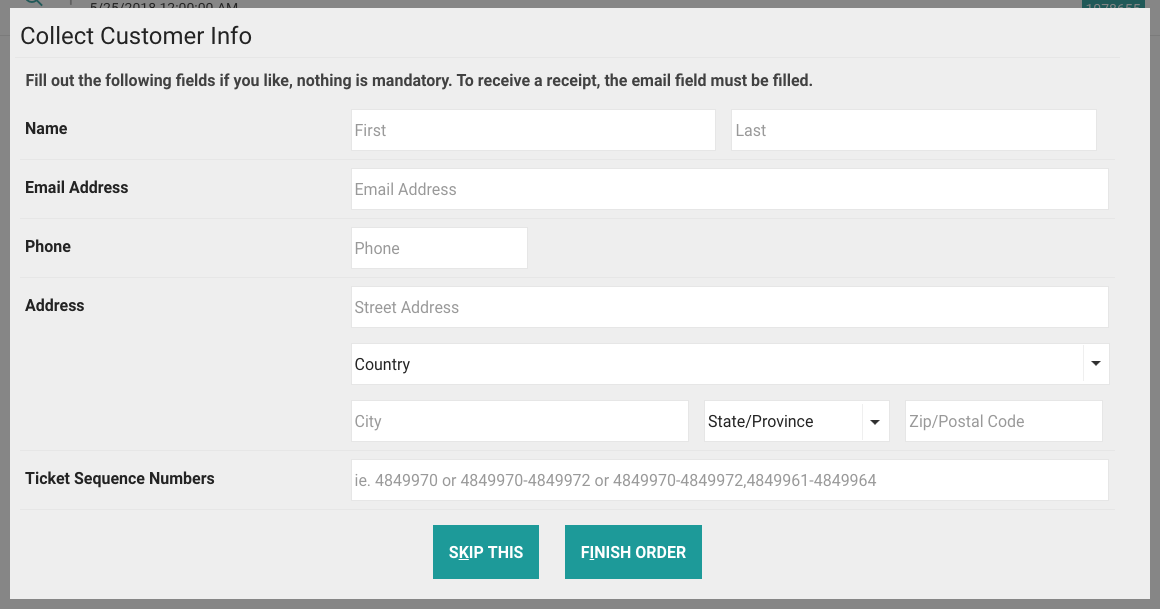
Nothing is mandatory, but if you want it for your records, you can fill it out. Click the Finish Order button or I hotkey.
Printing PDF Receipt/Ticket*
Some customers may want a receipt of their purchase or your event may be a print at home event. To print a ticket or receipt, you’ll complete the transaction as you normally would following the steps above. After you’ve filled out the customer info, the next pop-up screen will appear:
To print the PDF receipt, click the blue Print PDF button. A new window will open in your browser and you’ll be able to scroll through and print your completed tickets/receipts.